


My name is Chris and I’ll be riding my first Ride25 in June, on the Geneva to Milan route. I’m excited and daunted by the elevation and distances but equally determined to smash it: I’ve cycled further but over flatter terrain and have tackled similar elevations profiles but over shorter distances. The end goal of my training is to bring the two together and ensure that I won’t be getting off the saddle and walking up Nufenen Pass.
A bold but (hopefully) achievable claim. The Nufenen pass is pictured above with two Ride25 cyclists not even half way up, it will take about 2 hours to climb the 2,437m (8,100ft) ascent, it takes you straight over the top of the snowy bit in the picture!
This first instalment focuses on ensuring your set-up is up to scratch and conducive to a successful training routine, and figuring out where the gaps in your abilities lie. It starts at the basics (there’s nothing more off-putting than a training guide being targeted 20 steps above where you are), and is based around a 50 mile ride I did from Sevenoaks to Pulborough last week – nothing too intense as you can see from the map below.
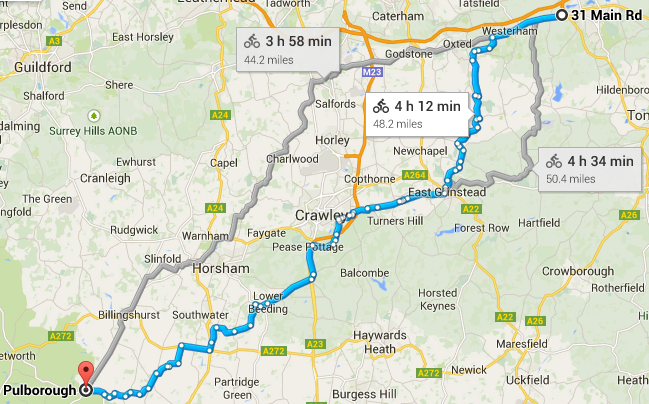
In the past I’ve used a MapMyRide, this time I used Google Maps. I’ve only recently discovered that the GPS functionality on my phone isn’t limited to areas with mobile signal (I must have missed the memo), which increases my flexibility when planning future rides.
On this ride my battery died after about 4.5 hours of navigating, and having it in my pocket with the Google Maps lady directing me through a single earbud headphone prevented me from getting regular visual confirmation I was going the right way. From now on I’ll be using Strava Route Planner to do my routes.
Lessons learned: Get a handlebar mount and a spare phone battery will boost my cycling range to about 9 hours per trip, and using Strava to get around the limitations of MapMyRide and Google Maps will make route planning smoother (part 2 of this training guide will be about how to best plan routes for training rides – coming soon!).
I tried cycling from Horton-in-Ribblesdale to Hebden Bridge in late Autumn, but regret to say I tanked half way from lack of energy. On this ride I filled all my pockets with nuts, oat bars and malt loaf, and had two litres of water on my frame to prevent from tanking again. See the post we did last year about Bonking on your bike, it’s not what you think, read all about it HERE.
Lessons learned: Eat sensibly and keep hydrated. Wholesome, pocket-sized food is best as you can stop up at the side of the road for a quick energy boost when you need it.
In terms of attire, I’m naturally suspicious of padded shorts: for me they take away from the adventurous aesthetic of cycling. Covering 50 miles in one go didn’t make me re-evaluate this stance. It did make me re-evaluate my choice of top, however – this time I ditched my usual jacket for a lightweight breathable waterproof jacket, and I doubt I’ll look back.
I already mentioned a handlebar mount as something my set-up would benefit from, but this ride also convinced me to pick up a small saddlebag, a pair of over-wheel mudguards (rather than the one I have currently that clips on the saddle), and a bag to sit on top of my pannier rack. Usually I use a rucksack (for commuting and rides of around 20 miles) but the constant weight and pressure gets a bit much after 50 miles! (This won’t be a concern on a Ride25, but good to know anyway).
Lessons learned: ride in what you’re comfortable wearing rather than what you think you should wear, although learn which types of clothing have which benefits – tailor your cycling wardrobe accordingly. Having storage on your bike rather than your back will ease the pressure on your back (and the amount of sweat you produce) on longer rides.
I find climbing hills to be primarily a mental challenge, rather than a physical one: my legs are more than happy to (and capable of) carrying on, but I keep telling myself it’d be easier to get off and walk (or questioning why I’m out in the cold in the first place when I could be indoors). This attitude is limited to ascents and is my main area of focus for training – learn to stop complaining and just get on with it.
Zoning out and cranking out a lot of miles is something I really enjoy. Once you get into the swing of it and know where you’re going, it’s a real treat to just keep going. Knowing that I enjoy this aspect of cycling and that I have the endurance to match is reassuring and let’s me focus my training on the things that need improving.
Lessons learned: Training rides that feature a lot of hills over long distances are probably most suited to my training needs, and focusing on my inner monologue when ascending is the key area of focus.
So, 50 miles may not seem much but as you can see it provided some useful insights! My advice is to make a similar ride the first part of your training routine: get out there and see where you want to improve and how you can make the whole experience more pleasant and efficient.
Part 2 of our training guide will follow later in the month and will look back to our post about keeping motivated during cycling training.
Leave a Reply